How We Grow Tulips
Tulips are a HUGE labor of love for us here at Bel Fiore Farm & Floral. How our tulips get to you is a long journey, a big investment, a gamble, and a lot of back breaking work!
Tulips are easily are most labor intensive and expensive crop to grow. Right when the tulip start to bloom, we are already working on next year’s order. We work with a supplier who gets our bulbs directly from Holland. Bulbs are NOT cheap and neither is the freight. We pay our invoice in July, get the bulbs shipped in October, plant by the first week of November and then wait until April to make our money back!
Growing tulips as a professional cut flower for the consumer or designer is a bit different than growing them in your garden.
First, we select tulips that we know will give us a long stem length.


How it Starts …
For the first 3 years of growing tulips, we would dig - by hand - these 6” deep trenches. We would dig 50 linear feet, 4 feet wide and 6 inches deep by hand. Dirt would go onto a tarp on one side while we dug out the trench. The next step is to lay out the tulips close together with “egg carton” spacing. We plant close together to help elongate the stem. Stem length is super important when growing tulips as a commercial crop.
Next, we cover up the tulips with 6” of soil we put onto the tarp. Those first few years we did this by hand, often into the dark of night. Then, we wait until April when they emerge. We harvest them at a stage called “Color Crack".” Once we start to see the bud color up, we pull the tulip out bulb and all.
As flower farmers, we grow tulips as an annual for several reasons:
1. The bloom is always the best the first year.
2. Since we are not letting the foliage die back with the bulb, it hasn’t had a chance to “replenish” the energy in the bulb to produce a bloom the following year.
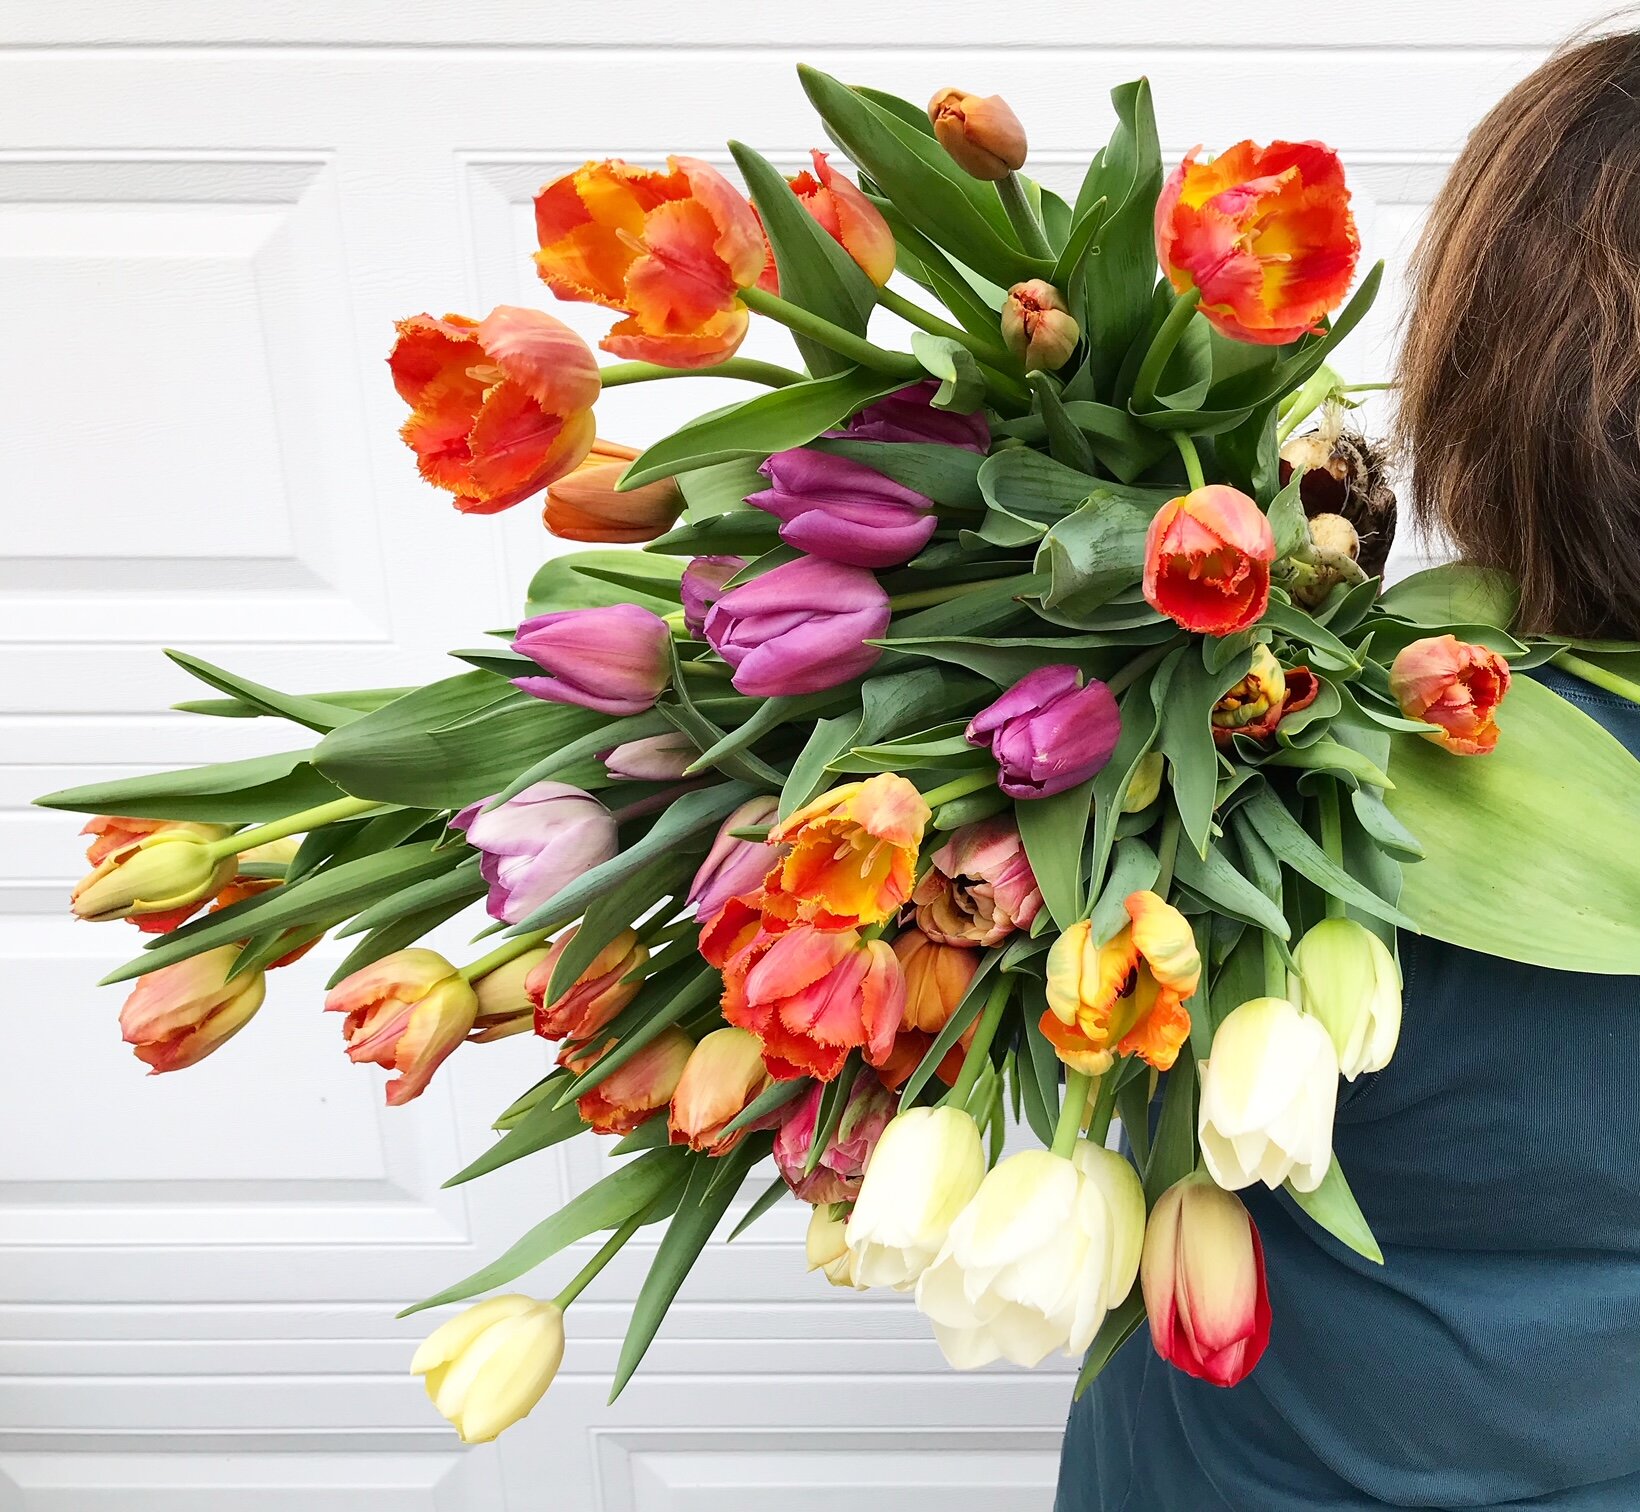
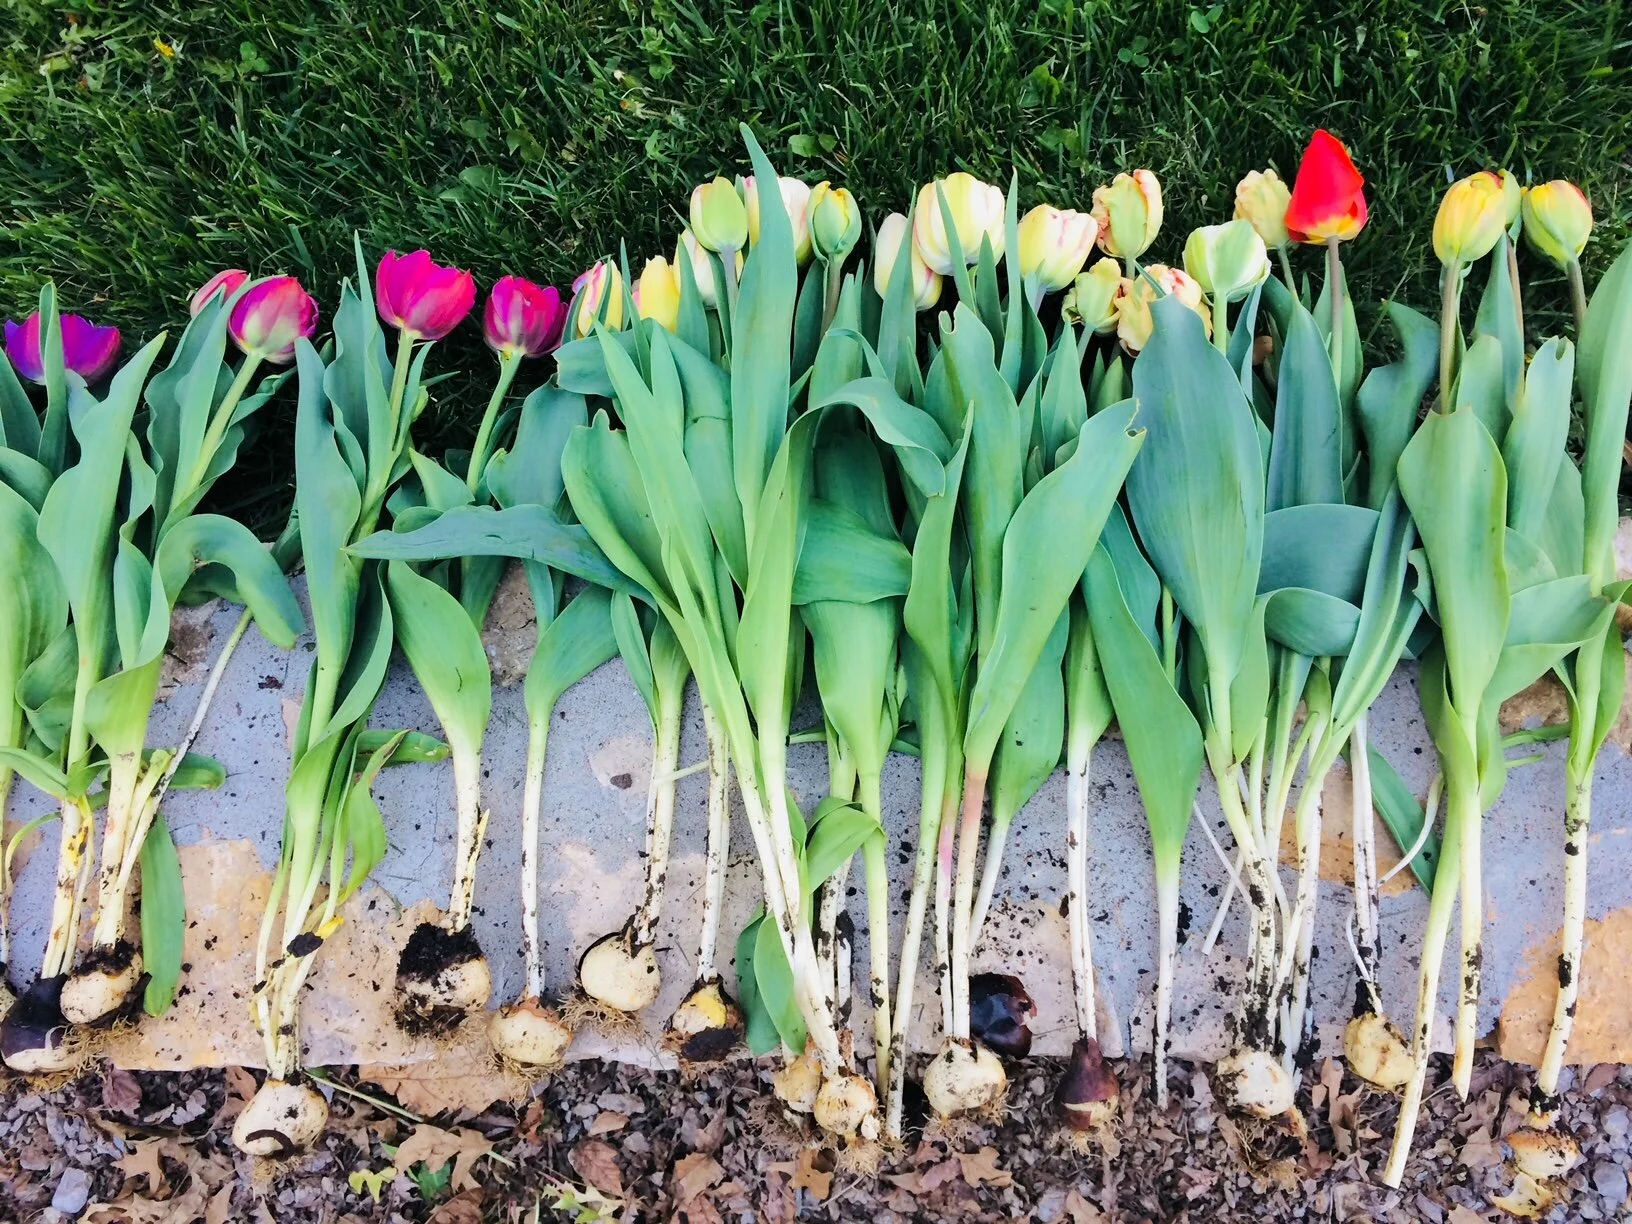
3. We are harvesting the flower with the bulb to get maximum stem length plus we personally like to store with the bulb on.
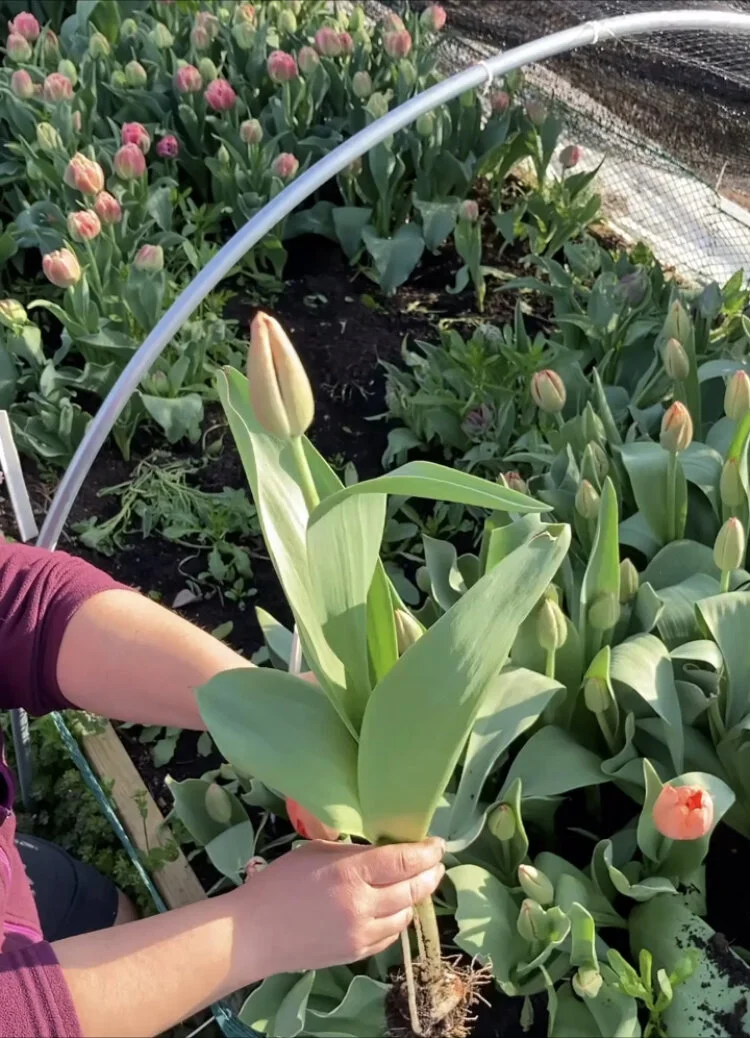

The photo on the left shows me harvesting the tulip after gently pulling it out of the ground by reaching down around the base of the plant below the leaves and at the soil line. The photo on the right shows the stage of harvest. When we see the bloom start to show it’s color around the crack of the petals, we know it’s ready to harvest. Harvesting at this stage allows for maximum vase life and allows us to store the tulip for longer in our walk in cooler. We try whenever possible to harvest at this stage or close to it.
After harvesting, it’s time to wash off the stems and take off lower leaves. It takes us sometimes hours to complete this process. We then wrap tulips together in bundles and keep them upright in the cooler to hydrate or we dry store them for later use.

So … what do you do with the bulb?
I’m glad you asked. Our #1 question is “Can you re-plant the bulb.” The answer is no. Because we haven’t let the foliage of the bulb die back naturally and we are yanking the stem, it won’t re-produce a bloom if re-planted. We have bulbs we’ve accidentally left in the ground 3 years ago and to this day we get 1 or 2 leaves, but no bloom. Once we take off the bulb it goes into the compost pile.

A New Method of Planting in 2021!
Thanks to our mentor, Jennie Love of Love n’ Fresh Flowers in Pennsylvania, we are now using a no-dig method for planting our bulbs! We are big believers in disrupting the soil as little as possible. No-Till and No-Dig is the way to go in our book! You can read about her method here.
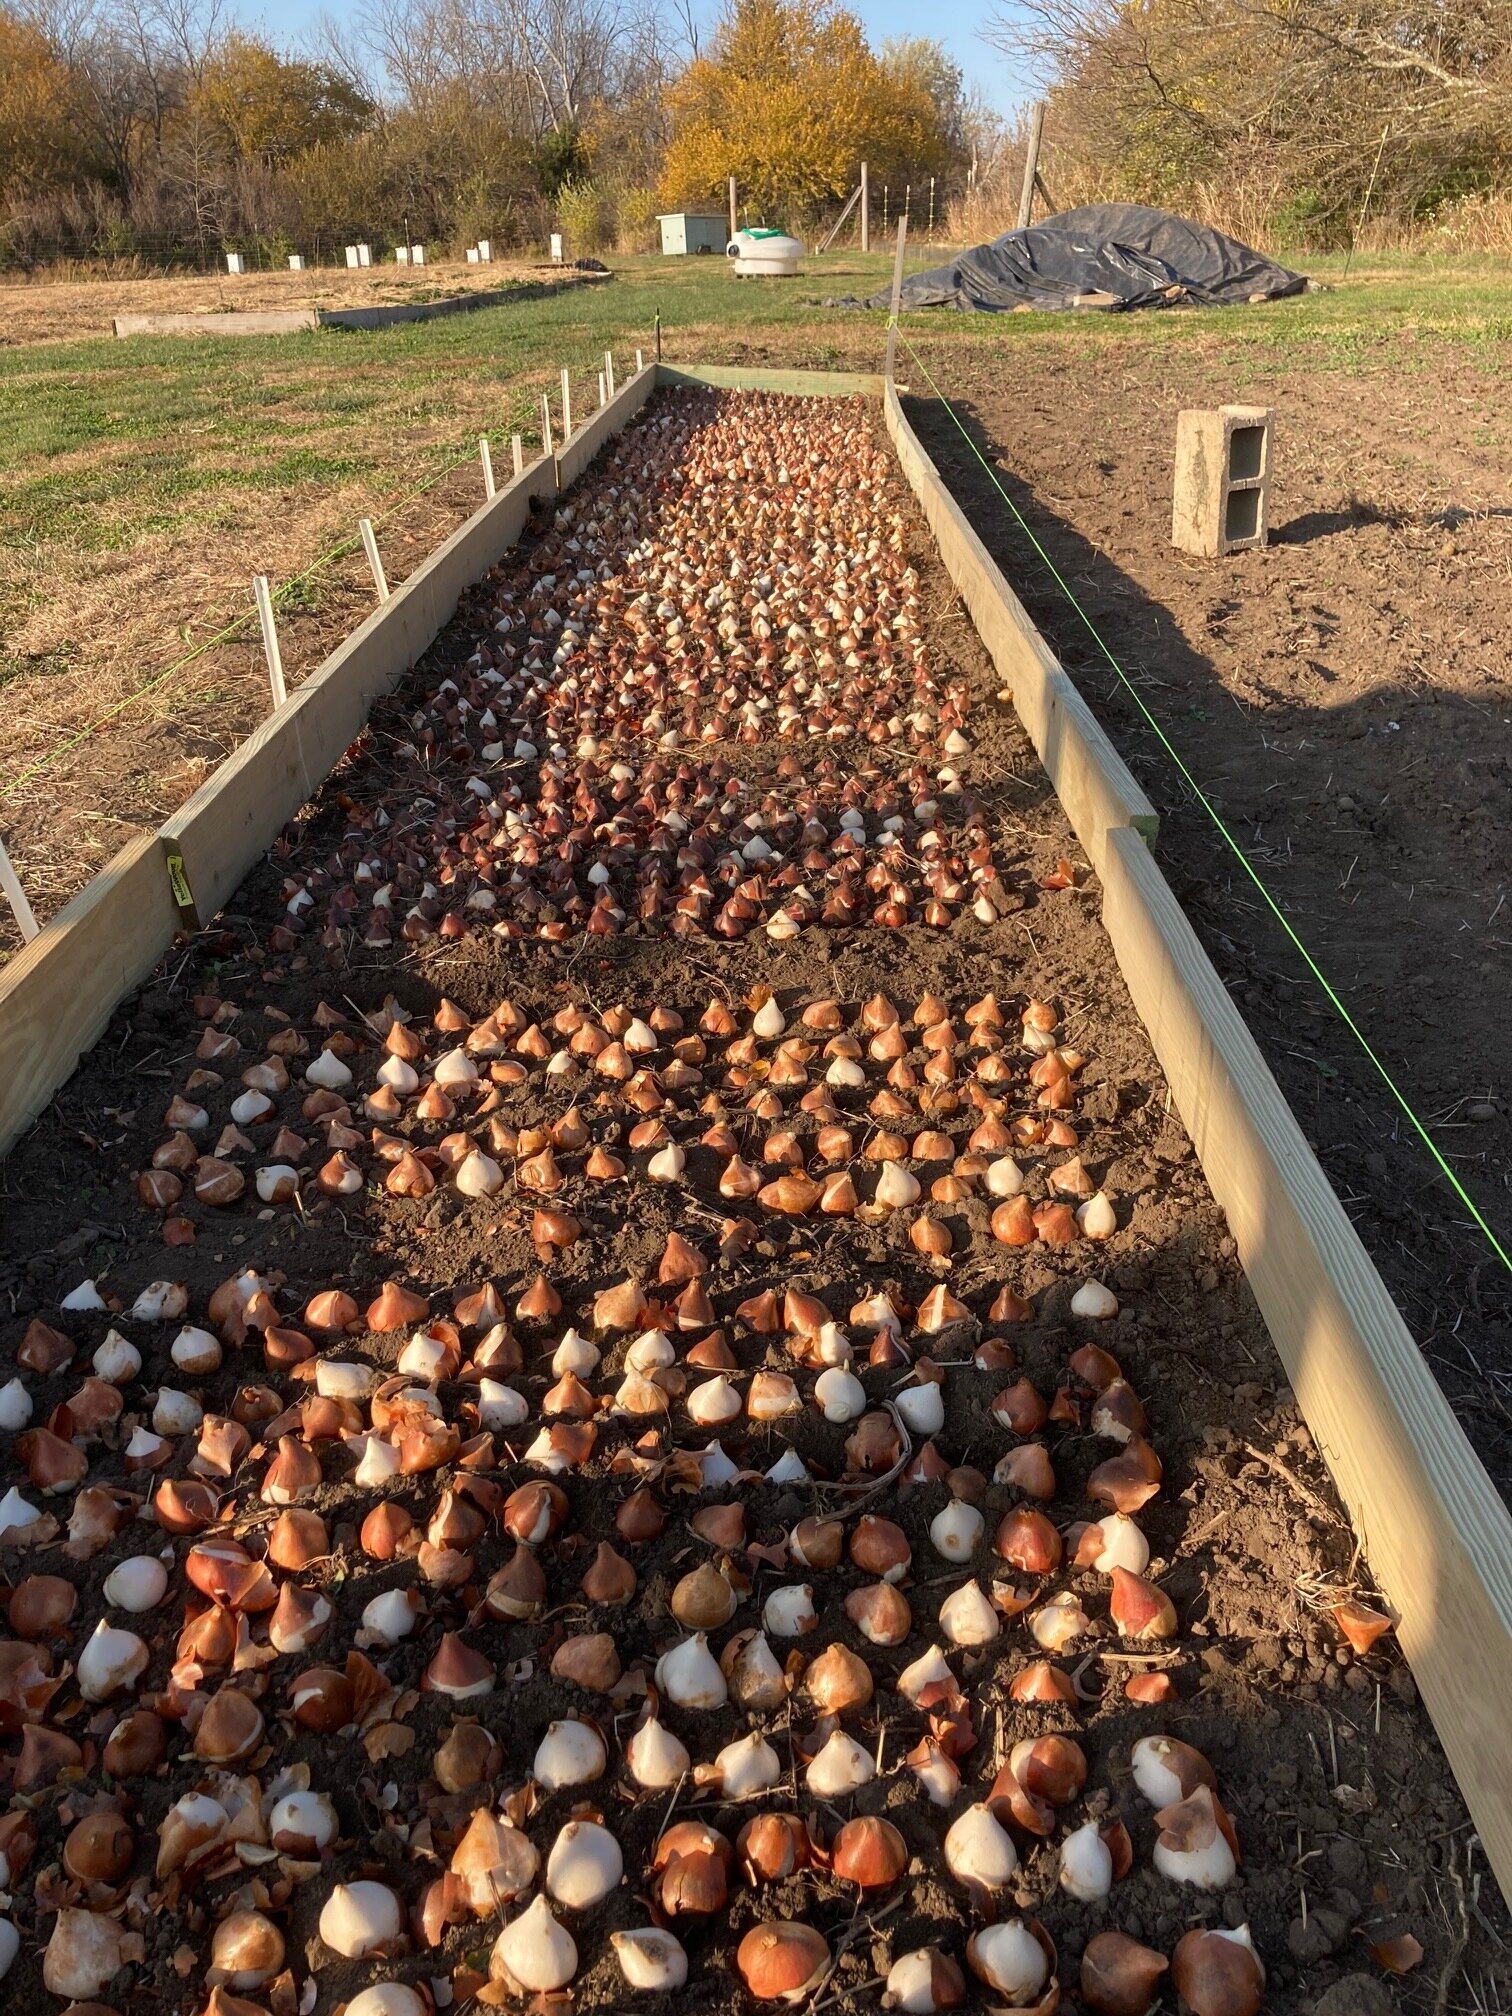
We followed Jennie’s instruction and built a 85 foot by 4 foot wide raised bed out of 2x6 lumber and rebar. We then laid the bulbs down on the soil using our “egg carton” method. As Ariel and I worked our way down the bed, the tractor came behind us with compost and carefully laid it on top of the bulbs.


The results of using this no-till, no-dig tulip planting method have been awesome! The tulips are SO much easier to pull out of the ground plus easier to wash. We did put down vole repellent around the bulbs (I Must Garden is my go to brand) and that helped deter them.
To help elongate stems, we put up hoops and covered with shade cloth. This, coupled with some netting, helped us protect them from deer. We used little clamps from Harbor Freight, but these blue snap on clamps from Boot Strap Farmer are our new favorite thing!

