Get Growing & Start Seeds - Part 2
Seed Starting is one of my favorite activities to do before spring. And it’s the perfect activity for when you are stuck inside (as we all currently are)! In today’s post, I will walk you through how I start seeds with links on where to find supplies.
Of course - MOST if not all of this can be found locally.
In Kansas City, here are the family owned garden centers that you can call and get supplies from. At last check all were still open.
Colonial Gardens
Farrand Farms
Family Tree Nursery
Heartland Nursery
Suburban Lawn & Garden
Below are instructions on how to start seeds ( watch my video here if you missed it ) along with a list of items needed and resources with links to buy online.

Sowing Seeds - Two Methods

Steps to Starting Seeds Using Flats:
Fill your tray inserts with seed starting soil mix and water in with a watering can.
Place your flat into your tray with no holes. When you need to water, you will lift up the flat of inserts holding your seedlings and use a watering can or cup of water to fill the tray. Seedlings will soak up water from the bottom. Do not overhead water as the small seedlings can wash away.
Using your pencil or end of your sharpie, make a small hole if needed, otherwise sow your seed on top. You can find germination instructions for almost all kinds of seeds - flowers and vegetables, at www.Johnnyseeds.com. Click on each seed page and scroll down to see the tab for growing instructions.
Using your dish and toothpick, wet one end and gently pick up each seed to place into each cell. After seeding, do a light dusting of vermiculite to cover seedlings.
Place your humidity dome over the flat.
Put your tray with seeds in the warmest place you have in the house or onto a heat mat.
Once the seeds have germinated, place them in a very sunny window or under a shop light with one warm bulb and one cool bulb. 14- 16 hours of light is ideal. You want the light source as close to the seedlings as possible, moving it upward as the seeds grow.
Keep seedlings above above 70 F degrees, but no lower than 65 F.
Check on your tray each day and watch for signs of drying out. Bottom water or use a spray bottle to keep soil moist.
Once seedlings are ready to be planted outdoors and after threat of frost has passed, it’s important to do something called “hardening off.” Take them outside and place under shelter for a few hours each day, increasing the time each day until they are outside all day and night before planting. This helps them adjust to coming from the inside to the outside.


Triple pack available from Greenhouse Megastore with tray, insert flat and dome.
Supplies for starting seeds with trays:

Our germination station set up in our dining room!
Seed starting soil mix. I like Black Gold Brands, but any will do. Don't use those coconut fiber pellets that come with sets- they don't work well.
1020 tray with no holes (You can purchase a tray, inserts with dome here or here).
Seed trays or 4 pack inserts (like you see at the garden center).
Vermiculite - a little goes a long way. Option 1 or Option 2
Humidity dome (most sets come with one like the one pictured to the right) or a clear plastic cover like these.
Shop light with - 1 warm bulb, 1 cool bulb. We use T8s from Menards.
Heat mat - helpful
Pencil or sharpie
Small dish with a toothpick
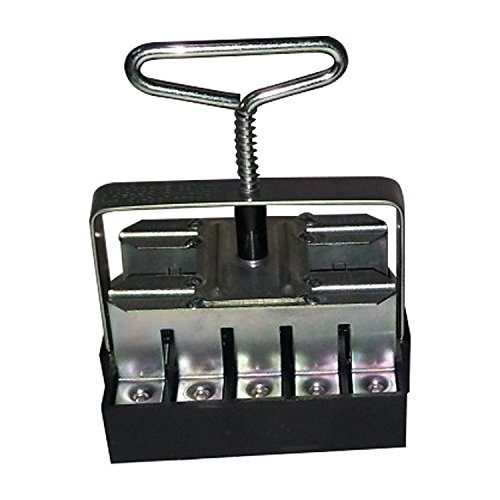
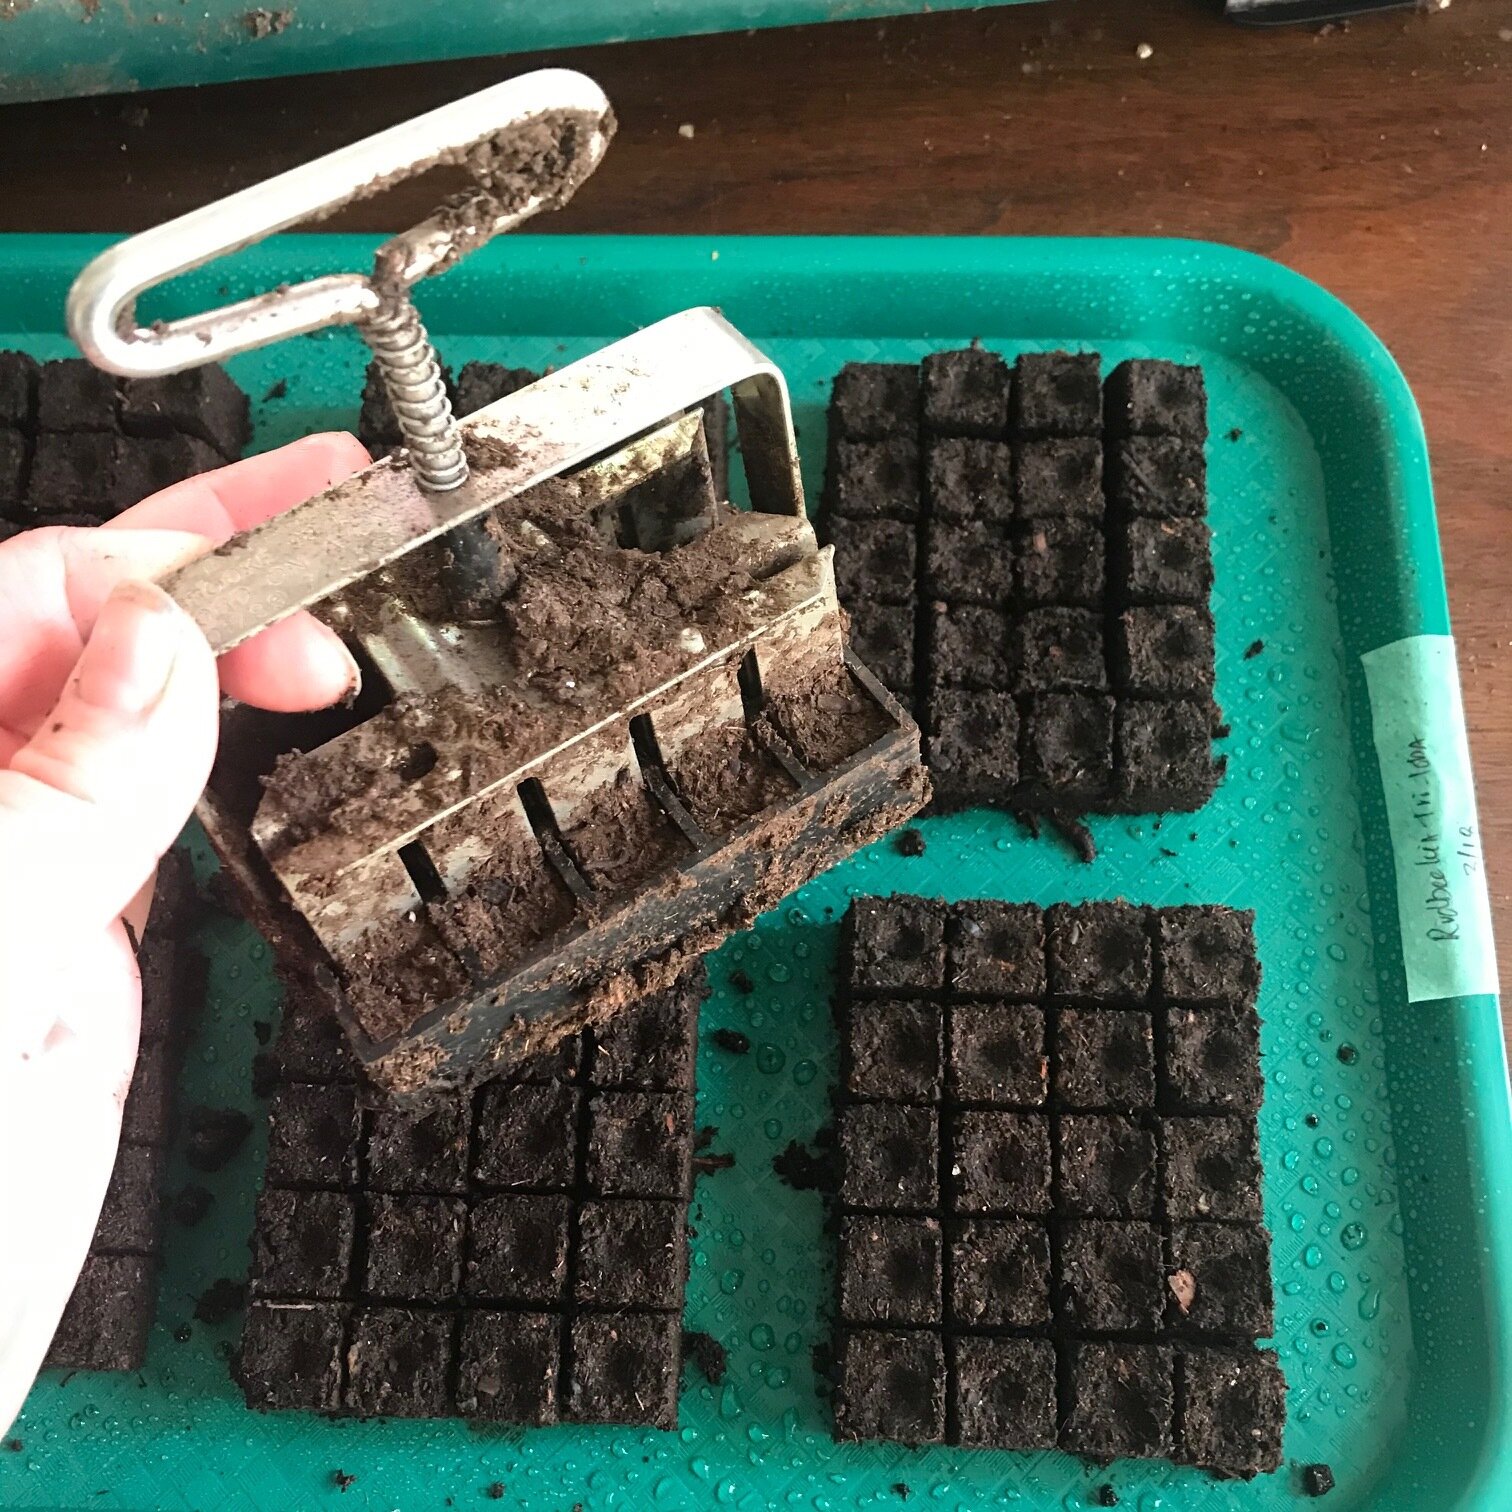
Soil Blocking:
In my video over on Facebook, I talked about another option called soil blocking. I use soil blocking to save on space. Added bonus - soil blocks produce healthy roots and diminish the need for hardening off.
To learn more about soil blocking and the steps to creating the perfect soil block - go visit my mentor Lisa Mason Zieglar’s website, The Gardener’s Workshop for video series.
Here is a supply list - but your best bet is to purchase a set which includes her soil mix, a soil blocker, and starter trays. I know Lisa still has some in stock. Another resource is Johnny's Seeds.

Seed starting using soil blocking supply list:
Soil blocking mix (pre-made or home made)
Soil Blocker - get the 20 blocker
Lunch tray, Styrofoam tray, or aluminum pan with lid
Plant tag or masking tape to put onto tray
Shop lights
Tray or Rubbermaid tub to mix water and soil for making blocks
Links to some of my favorite products.
(Note these are affiliate links)